
Changes so far:-
I fitted a pair of new Heidenhau K34 tyres with new Michelin Tubes
I have changed the handlebars to the standard for the bike.
I have re-routed the speedo cable to behind the bottom yoke instead of in front of it thus taking out an unnecessary S bend. I can now tell how fast I am going the needle used to oscillate wildly it still oscillates but not near as much. Actually the speedo is very optimistic. It is calibrated in Km with a MPH scale too. Rather than reading the MPH scale it is more accurate to divide the KPH scale by 2. So for example if the scale reads 70mph or 112kph I am really only doing 56mph (verified using GPS). To actually travel at 70mph I would need to have the speedo showing 140kph or about 88mph.
I stopped the carb jamming on full throttle – the O ring on the carb top was not properly seated.
 I have fitted a rear carrier so I can use my old Givi top box.
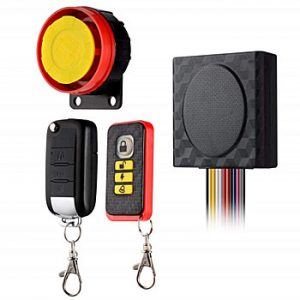

Blue Fire Anti Theft Alarm
I have fitted a Bluefire anti-theft alarm
I have fitted a diamond crash bar. Quite a job – I needed to get it as high as possible to avaoid fouling the mudguard under heavy braking. The supplied clamp may have been OK I’d I had square section fram tubes! I had to purchase a 38mm exhaust clamp, and drill extra holes in the engine plates PIC
I have fixed the main beam and dip. I assummed that their poor preformance was simply a feature but there was a fault. The wrong spring washers were used on the alternator studs. There were too big and one had spread and was shorting out a coil. I removed the washers and applied locktight.
I have carried out a full 9000 km service.
The front brake – see below.
The Front Brake
I have not done many miles on the bike, but enough to see that the front brake was not a powerful stopper.
But reading on the message boards it seems it could be better. All that was needed was British linings and cable and careful synchronising of the twin leading shoes.
There does not seem to be any way to tell what shoes were actually fitted so I bought some new shoes and cable from Hitchcocks and installed them, taking great care to ensure that both shoes operated at the same time. I did this by reversing the mod to give individual setting on the cams then operating the brake when it was off the wheel and adjusting the gap behind the cams using the link rod until both were the same.
I was pleased with my self and put it all together in full confidence I would now have a great front brake
The bloody thing only just managed to slow me down!
Off with the brake again. It was obvious that only a very small area of the lining – in the middle of the shoes was making contact with the drum.
With the help of google I learned about arcing. This is to set the arc of the shoes when in contact with the drum to have the same radius as the drum. Seemingly it can be done by sticking sandpaper to the inside of the drum then rotating the wheel with the brake on to rub of the high spots. An hour’s hard work made little difference.
I took another look at the old shoes. They did not seem to bad. Certainly as thick as the new ones (and probably thicker if the new ones were arced properly). So back they went. But this time engage brain!
There is a raging debate on the web about setting up the front brake. The standard linkage has a left hand thread at one end and a right hand thread on the other and the idea is that you adjust the distance between them so that both shoes make contact at the same time.
Now with brand new and properly arced and perfectly matched linings and perfectly spaced cam spindles and fixed spindles I can see the point of this.
But my old linings may not be perfectly matched and I’m not sure about the spindle positions and there would be little I could do about it anyway.
The modification is to drill out one of pins so that cams can be adjust individually. The bike had had this mod done when I got it.
So I re-did the mod with a slight difference in that I added another locknut UNDER the drilled out pin as well as one to lock the adjusting nut. This is to make sure that the linings go OFF together.
Then I adjusted the shoes, in the drum, on the bike so that both were coming on together.
Then a test run, and I now have a powerful front stopper.
I think both methods arrive at the same point if done properly. The brake arms look parallel. I can’t measure and difference with a ruler. I probably could with a vernier caliper.
As for the new brake shoes – they are waiting for me in a few thousand miles
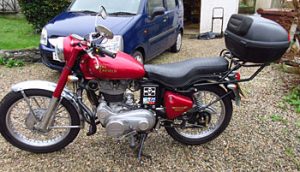
In General
I am really happy with the bike. It has been well looked after. It runs very well and starts easily on the kickstart. It is clean with no oil leaks. I checked the ignition and its is spot-on 8.5mm or 32degress BTDC when fully advanced. There is ATF in the primary chain case. The battery is only 9.5AH instead of the standard 14AH, but it starts the bike if required. I usually use the kickstart to start and stop it with the decompressor.
Only about 200 miles on it so far – hopefully many more to go.