
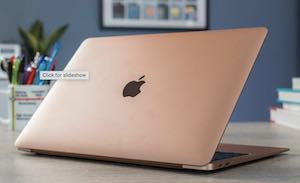
StorageI am very used to managing my photos on a Windows computer using my old Photoshop CS2. I’ve been using it for over 15 years. I used to use actions in Photoshop to batch edit hundred of photos at a time when I did wedding and nursery shoots. But CS2 doesn’t work on my MacBook air, and I do not shoot professionally now, so I can make do with less power. But it’s a relearning exercise. All of this is probably very elementary for a seasoned MacBook user but it’s all new to me. |
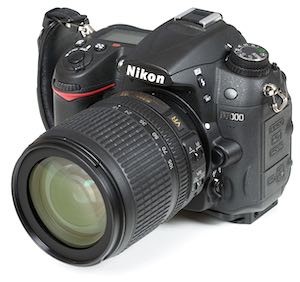 I take photos with an Iphone 12 and a Nikon D7000. The Iphone photos load up automatically to Apple Photos. It took me quite a while to find how to get the photos from the D7000 to the Macbook, and I can honestly say the web was no help at all. Most sites said use a hub. I haven’t got one, and it seems many people are reporting troubles with them anyway. |
 Then, when the camera was connected I went to import photos on Apple Photos – and there they were!!! Even though the Macbook was telling me it could not see the camera, Apple Photos could. (This machine can be infuriating). Anyway I can now import photos very easily into the Macbook. Once in, I add location and tags to make them easier to locate in the future.Editing Not so the action camera. The Macbook would not see it and would not recognise the card reader. The Windows PC could not see the camera either! Nor could either machine recognise a micro sd card in an an adaptor in my (admittedly very old) card reader. But the windows machine has an SD card slot, and it could see the cameras micro SD card in the adaptor. Then Apple photos (NOT finder) could import them over the network (which I now have to log in as a guest for some obscure reason). This machine is a pain in the bum at times. |
Editing
Apple Photos, or Preview with a bit of practice are good editors for my current use. So my procedure now is:-
- Put all my pics on Apple photos. If I want to edit some on CS2 I can simply copy them onto the icloud which I can access from my old windows 7 pc, but Apple Photos or Apple Preview should be OK for 95% of my stuff.
- Work on pics then export them at a suitable size for the final destination.
Pics from screen capture
Sometimes I need to grab an image from the screen to put onto a website (like this one)
Quickest way is to use <command><shift><f4> to grab the pic from the screen
It appears as a thumbnail at the bottom of the screen
Right click and open in Preview
<Tools><adjust size> Take it down to a sensible size for the final destination (1000 px wide is ok for most web applications)
<File><export> as JPEG Quality of around 50% is good enough for the web. Put it somewhere you can find it.
The images do not go into apple photos. I am quite happy with that.
Editing images in Photos
There is a good general description here but I’ll do a cut down one for old photoshoppers like me.
Note – I always shoot in jpg, I never use RAW files. But I mistakenly took a few in RAW on my Nikon D7000. I was quite amazed when Photos opened them. Gimp opened them as well, but seemed to convert them to Tiff files. Gimp seems a reasonable editor, but I really can’t be bothered to scale the learning curve.
Nowadays all I need to be able to do is to adjust exposure and saturation slightly, maybe clone out some bits I don’t want, crop and resize the image to suit it’s final destination. I usually
Anyway –
- Double click on a pic in Photos, it will open.
- take the pointer to the top of the screen to show the menu bar
- Confusingly, Apple have decided to show two clickable labels called Edit. The one you want is at the top right of the screen. This will bring up an editing side panel in the Adjust Mode.
- The Light, Colour (wow, British spelling!) and Black and White are self evident.
- Command + and – work to zoom in and out. It does not zoom in far enough to see pixels.
- Retouch is similar to photoshop’s clone tool. Adjust the brush size using [ and ]
It is not nearly as good as CS2’s clone, it gets all confused if it is more than just a spot. - Cropping is easy, but it is done to an aspect ratio rather than the size. Then the file is exported at the required size.
- More to follow as I work out features as I need them.