
This is about a preamp I made for personal use with the Home Made Busking Amp. but it will work happily with any amp or PA system. It works fine with our Behringer B208D for example.
Requirements were:-
- Small size
- Battery Driven
- Low consumption
- Fuss free.
Small Size
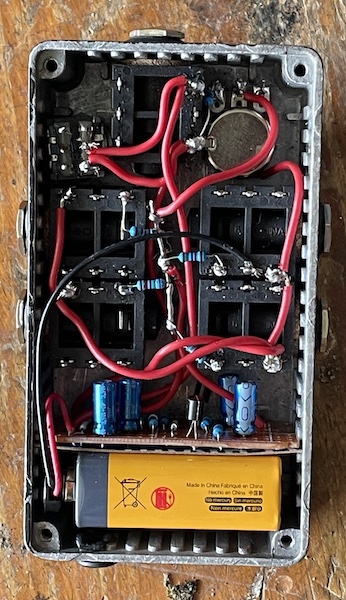
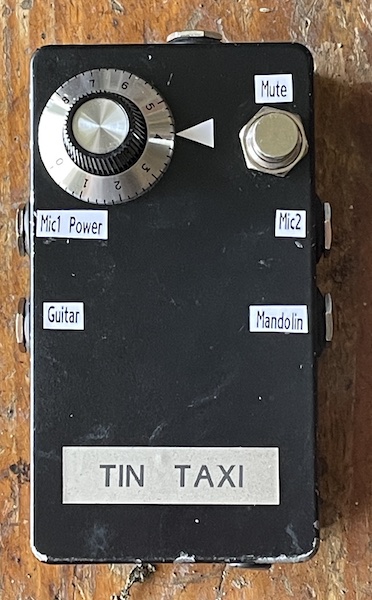
It is all contained in a 2″ x 4″ die-cast box which can be attached to the mic stand (I use a niece of an old motorcycle inner tube) or simply laid on the floor.
Battery driven
It is powered by a 9V PP3 battery.
Low consumption
It takes about 1.2mA from the battery when in use, slightly more if the clipping LED operates.
Fuss Free
The preamp has four inputs and although there is an overall gain control, the channels gains are preset. There are two microphone inputs with low impedance inputs (1.5K), and two instrument inputs with higher input impedances. The relative gains for each channel are preset for our instruments.
One of the the inputs is designed to suit my guitar. The Guitar is a Freshman FA350FBF fitted with K&K piezzo pickup. This feeds into a relatively high impedance (300K)
The other input suits my wife’s Mandolin, which is a Kentucky KM-140S fitted with a generic pickup I bought very cheaply from ebay. It feeds into a lower input impedance (75K).
There is no on/off switch. The preamp is switched on when one of the mics is connected.
There is a single volume (or gain) control knob.
There is a mute button, which can be hand or foot operated.
There is a level indication LED which glows as the signal approaches saturation (at around 6V p-p) at the output
Design
The amp is again based on Rod Elliots simple mic amp. It is a very simple and low cost design. I altered the biassing to make it work from 9V. A side effect of that is to increase the feedback via the biassing path. Taking into account the biassing path feedback and the open loop gain of the amp, the maximum gain of the preamp is around 325 or 50dB.
An extra 1/4″ jack socket was added to the busking amp. This provide an input directly to the power amp and disconnects the internal preamp. As the internal preamp is almost the same circuit as this one, and takes under 2 mA I did not bother trying to disconnect its power supply.
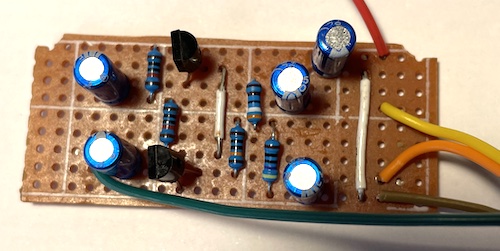
The circuit
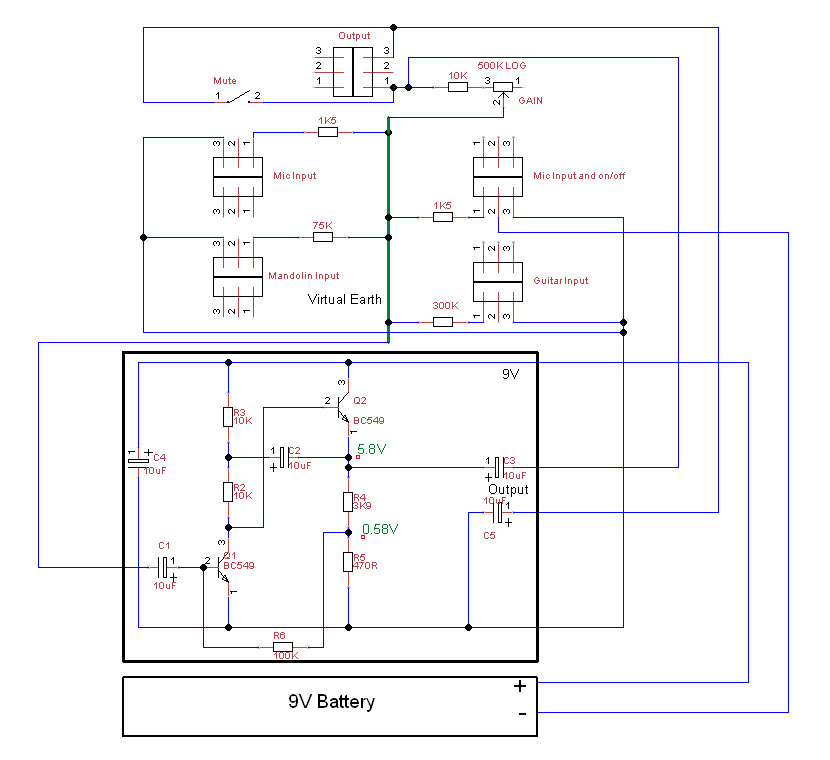
The input resistors, and the feedback resistors are all off-board for easy mods if required.
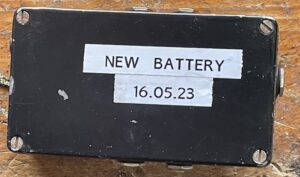 A PP3 has a capacity of around 500mA hrs so it will last around 400 hrs usage. I decided to adopt a strategy of changing the battery once a year rather than adding an indicator led as the led would take as much power as the amp, and thus half the battery life.
Update 7/6/2023 I added a clipping detector. This is simply a bidirection red LED (which is really two LEDs side by side in the same package. I have had this for quite a while and they now seem to be unobtainable) in series with a 300ohm resistor. The LEDS start to glow when the output voltage get above 1.8V peak or -1.8V trough. It take zero current until it operates and then only a couple of milliamps. The idea is to keep it OFF as the preamp will clip and give rise to distortion
Background.
The busking amp has it’s own preamp built in so why build an external one?
We were using mics for the instruments, but we decided it would be good to plug the instruments in. This has a few advantages.
- We can step back from the mic stand when not singing
- We have two less “open”mics which reduces the onset of feedback.
- We can tweak the volume, or mute it from the mic position instead of walking over cables, and past stands to repack the amp.
- The amp can be remote.
With the mics, the busking amp was set up so that the ratio between the instruments and the mics was preset. This ratio was carefully set once, at home and no adjustments are needed on site.
I decided to carry this over to the external preamp.
Spin offs
The amp can easily be used as a stage monitor. Plug a Y splitter into the input socket, run one cable to the preamp and another to the PA. We can then alter the sound volume or mute it from the mic stand.